Category: Home Lab

New Additions to My Home Lab: HP MicroServer & Synology NAS

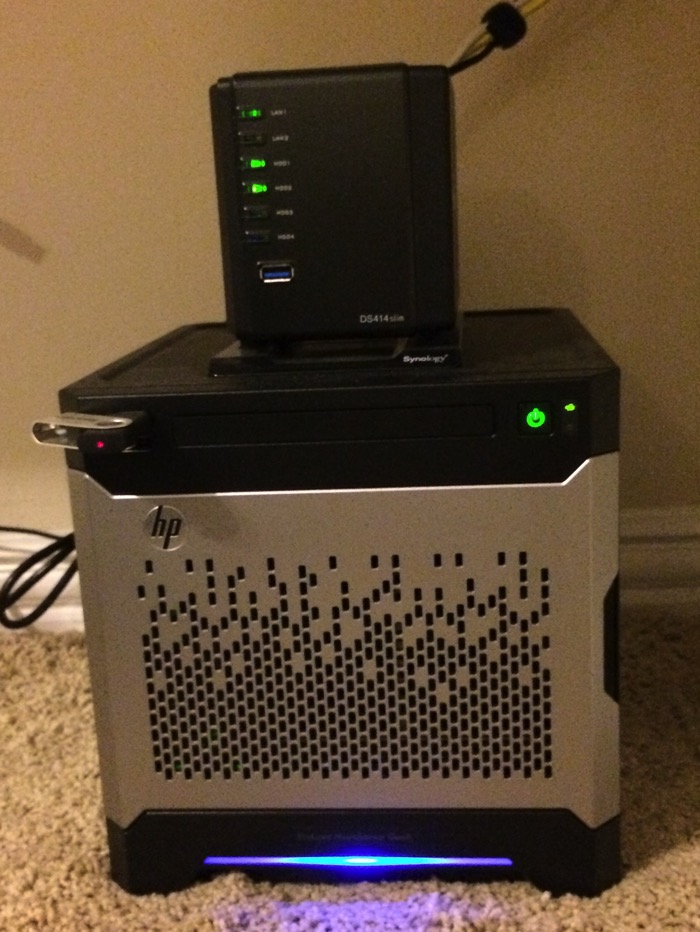
I have been preparing for my VMvware Certified Professional (VCP) exam. Early this year I decided to invest and buy HP ProLiant MicroServer G8 and Synology DS414slim NAS appliance to expand my home lab.

I’m one on those who learn better by doing rather than reading and I wanted to rely on practice labs and hands-on experience instead of books and practice tests to pass the exam.

I bought everything from newegg.com. The HP MicroServer came with 8GB of RAM installed. I then upgraded the RAM to 16GB and downloaded the ESXi 5.5 ISO directly from the HP website which comes with all the drivers required to run ESXi on HP ProLiant servers.

I’m running few VMs on the HP server including the VMware vCenter Server Virtual Appliance (vCSA) which manages my ESXi servers. The HP server is one of two ESXi servers I have running. The other ESXi server runs inside VMware Fusion (nested) on my iMac. Because my HP server and iMac desktop have two different CPU architectures, I had to enable VMware Enhanced vMotion Compatibility (EVC) to provide CPU compatibility and support for vMotion and DRS.

I populated the Synology appliance with two SSDs configured in RAID 1. On it, I have a datastore configured that provides NFS storage to my VMs. I also store there all of my ISOs and OVA files.

I’m happy so far with both devices. The HP MicroServer is relatively quiet compared to other devices I have seen. In terms of noise the HP MicroServer fan generates on average 40 dB-A of noise (equivalent to the noise which a fan of Dell Latitude laptop would put out) according to my iPhone noise meter. The Synology NAS appliance is also pretty quiet. Its fan comes on for few seconds only when the CPU is doing heavy processing. I keep both devices in my home office, which is where I do most of my work.

One thing I wanted to do was to schedule automatic shut down at night to save power. So I searched online for a script to do so but the problem I ran into was that in vSphere 5.5 the host had to be put into maintenance mode before it could shut off gracefully. That meant that the server would come up as a result in maintenance mode when it powered back on and I would need to intervene and take it out of maintenance mode every time.

After experimenting with few ESX CLIs and with some help from the online community I came up with the following Apple script (hack) which basically shuts down the powered on VMs, puts the host in maintenance mode and then issues a shut down command with a delay of 10 seconds. Before the delay timer expires the script executes another command (last command below) and takes the host out of maintenance mode. When the delay timer finally expires the host gracefully shuts down.

do shell script “ssh -i sshkey [email protected] vim-cmd vmsvc/power.shutdown 1”

do shell script “ssh -i sshkey [email protected] esxcli system maintenanceMode set -e true -t 0″

do shell script “ssh -i sshkey [email protected] esxcli system shutdown poweroff -d 10 -r Shell”

do shell script “ssh -i sshkey [email protected] esxcli system maintenanceMode set -e n -t 0″

From there I scheduled an action in my Apple calendar to launch and execute the script every night.

HP MicroServer G8 + Synology NAS

I will be sharing in future posts some of the lessons I have learned during my prep journey so stay tuned for that.

Anas

@anastarsha


Additional Information:

Install VMware ESxi 5.5 on HP ProLiant MicroServer G8

HP ProLiant MicroServer G8 Links 


Share This:
Facebooktwitterredditpinterestlinkedintumblrmail

Building A New Home Lab – Phase 1

I have big goals set for this year and one of the things I need to archive these goals is a home lab to train on OpenStack, network virtualization, hypervisor networking, and just virtualization in general. In this post I will be sharing some details on my new home lab which I’m in the process of building.

For me the one thing I was trying to avoid was investing in physical hardware as I don’t have much space at the moment to place the servers. So far I have managed to run everything in Virtual Machine (VM) form factor. However as the lab grows I will probably need to invest in some physical servers.


Few Upgrades First

Before deploying any VMs I had to do some upgrades:

 – Upgraded from VMware Fusion 4.0 to 6.0 Professional on my iMac which is 30% faster than 4.0 and supports creating additional virtual networks (similar to Network Editor in VMware Workstation)

– Upgraded my iMac memory from 12GB to 16GB to make room for additional VMs


Spinning Up VMs

I then deployed the following VMs:

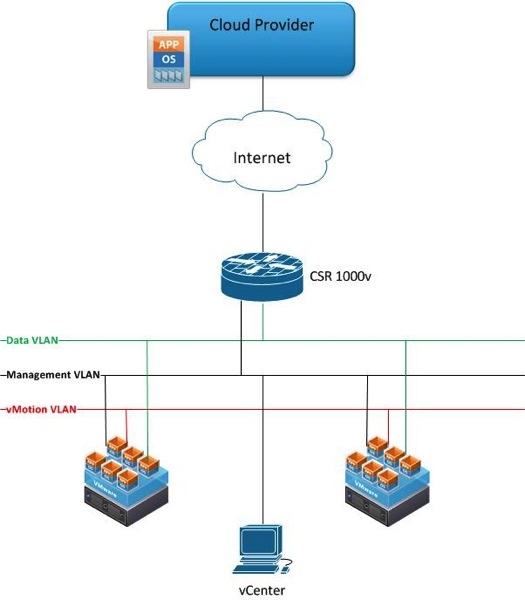
A Cisco CSR 1000v router as an internet gateway where I do packet filtering and run IPSec VPN with my cloud provider.

– 2 x VMware ESXi 5.5 hosts running on Fusion for VM mobility, HA, etc..

 – VMware vCener 5.5 server running on Windows 2008 server to mange the two ESXi hosts (I will be also trying the vCenter virtual appliance shortly)

– Windows 7 VM to run the vSphere Client and run other monitoring/debugging tools. 

I will be sharing over the next few weeks some interesting use cases I have been working on. Make sure to subscribe to the blog to get notified when I add new content.

Let the fun begin!

Homelab


Share This:
Facebooktwitterredditpinterestlinkedintumblrmail

Spin up Cisco CSR 1000v in VMware Fusion in 5 Minutes

I have been using the Cisco CSR 1000v as a default gateway in my home lab and I run an IPSec tunnel & LISP between it and my cloud provider (more on LISP in a separate post). The CSR 1000v runs on VMware ESXi, Microsoft Hyper-V, and Amazon Xen hypervisors but it can also run on a laptop/desktop hypervisor like VirtualBox or VMWare Fusion for testing or training purposes.

In this post I will show how to spin up a CSR 1000v instance in VMware Fusion for Mac.


Requirements:

1) I’m running VMWare Fusion 6.0 Professional but you can also run this virtual router on Fusion 4 or 5. I highly recommend using Fusion 5 Professional or 6 Professional if you want to create additional networks and assign the CSR 1000v interfaces to those networks. The feature to add additional networks (similar to Network Editor in VMWare Workstation) was added by VMWare in Fusion 5 Professional and it’s not available in the standard edition of Fusion. Alternatively if you don’t want to pay the extra bucks for the Professional edition, you can use this free tool from Nick Weaver to create the networks if you are running the standard edition. Nick’s tool isn’t the best but it does the job.

2) Go to Cisco and download the latest and greatest software version of the CSR 1000v. The CSR runs Cisco IOS XE and you need to download the OVA package for the deployment.

 
Installation:

The installation process is simple and quick:

1- Launch Fusion and go to File -> New from the top bar menu

2- Once the Installation wizard starts click on More options.  Select Install an existing virtual machine and click Continue.

3- On the next screen click Choose File. Navigate to the folder containing the OVA package, select the file, and click Open and then Continue.

4-  The next window will ask you to save the VM name, choose a name and click Save.

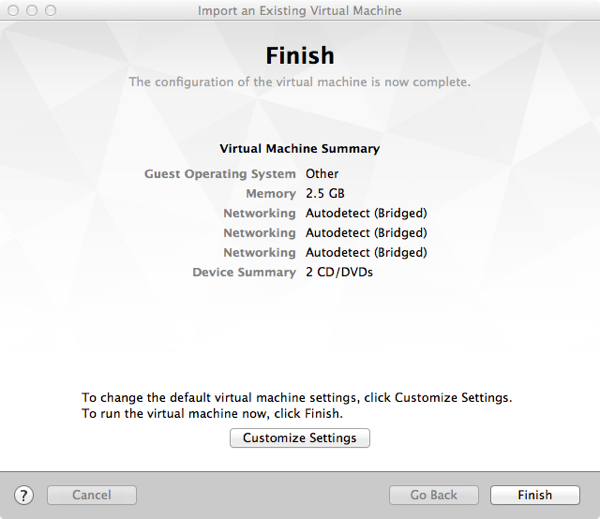
5- The final step of the wizard is to either customize or click fire up the VM. The CSR 1000v by default comes with three interfaces. If you need to add more interfaces click on Customize, otherwise click Finish.

Finish

 
6- Once you click Finish, the CSR 1000v will boot a couple of times and then you will be in traditional Cisco router User Mode.

 
Interfaces Management:

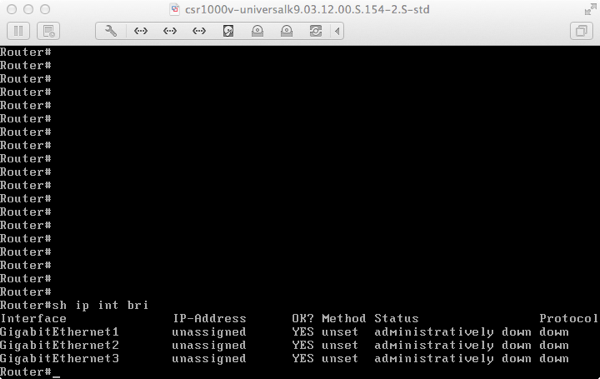
Enter Exec mode and enter “show ip int bri” to see the three interfaces. 

CSR interfaces


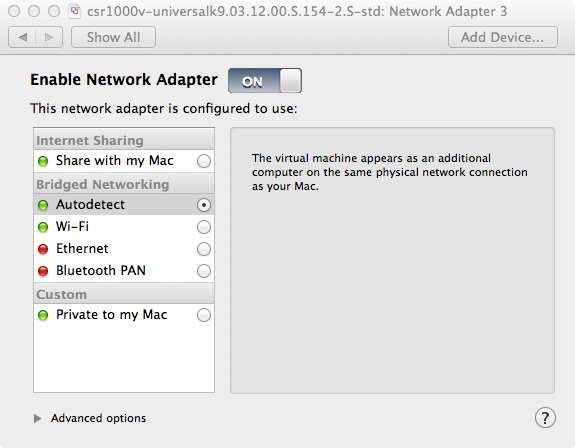
By default interfaces will become part of the Ethernet or WiFi network (that’s done by Fusion) depending on which adapter is active during the installation and you can assign from here IP interfaces and default gateway.

Adapter setting


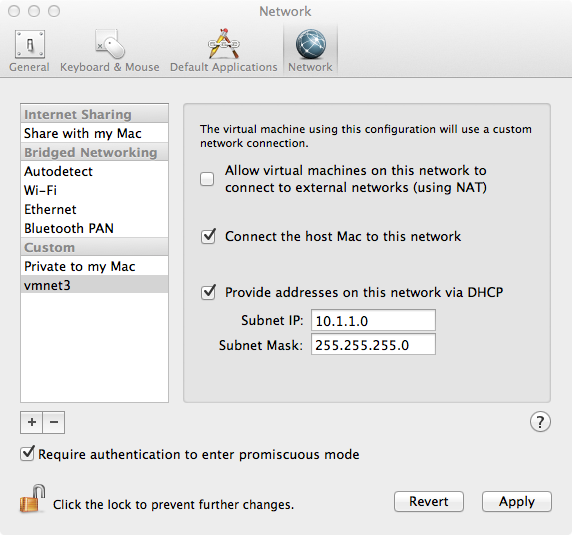
If you wish to put the interfaces on separate networks (VLANs), select the CSR VM and go to Virtual Machine -> Setting and choose the desired Network Adapter. You may also create custom networks by going to VMWare Fusion -> Preferences -> Network. From there add the + sign to add additional network and choose wether to enable DHCP or not.  

Add network


Activating The License

In order to enable the full features of the CSR 1000v, you need to purchase a license from Cisco. If you want to try the full features before purchasing, Cisco offers 60 day free trial license. To activate the free trial license, go into the router configuration mode and enter: license boot level premium. You will be asked to boot the router after you enter the command.   


Share This:
Facebooktwitterredditpinterestlinkedintumblrmail